How to Revive Tired Eyes
Most recently updated 1/12/21
If the stress of the past few months hasn’t made itself known on your complexion, then perhaps its side effects have: Lack of sleep, reduced physical activity, increased caffeine, and excess alcohol all spell bad news for your skin. And nowhere is this more obvious than your under-eyes. (Ah yes, windows to your soul… and your frazzled new normal).
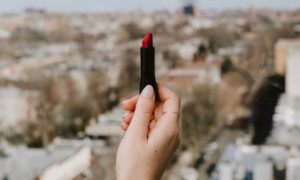
Since one of the easiest ways to detract from tired eyes, a bright pop of lipstick, is no longer on the agenda in our new, face-masked normal, consider these skincare and makeup strategies instead. They’ll help you shake off the sleepiness and look fresher and brighter — no matter how many zzz’s you clocked last night.
Step 1: Depuff and Brighten
Eye cream makes a great base for concealer, plus it plumps out fine lines and adds a little luminosity that makes your eyes look instantly fresher. Prepping with an oil-based version, like Odacité Baobab Sasparilla Serum Concentrate, is ideal, notes makeup artist Jenny Patinkin, because “the high water content in most eye creams eventually evaporates and can leave skin looking a bit drier.” The Odacité formula has the added benefit of circulation-boosting botanicals, like the vitamin F-rich baobab, which help to reduce the look of dark circles and puffiness.
A little massage can help take down shadows and puff, too: Take a roller, like the Jenny Patinkin Rose on Rose Face Roller, and move from the inner corner of your eyes towards the top of your ear and temple. “A series of short strokes followed by one long stroke will help stimulate that lymphatic drainage, breaking up the fluid and darkness that’s accumulated under the eyes,” adds Patinkin.
Step 2: Correct and Conceal
More isn’t more when it comes to concealer. “It just draws more attention to age-related changes under the eyes,” says Patinkin. If your dark circles are particularly intense, consider applying a sheer layer of corrector, like Au Naturale Color Theory Creme Corrector, first to neutralize the shadows — and prevent you from overapplying the concealer to follow.
Patinkin suggests applying a creamy concealer, like Kosas Revealer Concealer, on the back of your hand first, not directly onto your undereyes. This will also help you keep a light hand. Then, you can tap it on with your ringer finger or dab it on with a concealer brush for a more air-brushed finish. Patinkin’s Conceal + Buff Brush has 2.5 times as many bristles as other concealer brushes, which makes for a smoother and more even application.
Step 3: Set Your Shadow
Tiredness drags everything south, but the right eye makeup will lift it back up. Using a palette of coordinated, neutral hues — like the Ere Perez Chamomile Eye Palette — dip into a taupey, matte hue first. Patinkin says to swipe it along your lids, followed by a slightly darker matte hue just along the socket. “Apply it just above the crease, which will make your eyes look bigger and more awake,” she notes.
Finish by dotting a pale shimmer shadow along your tear ducts, down the center of your lid above your iris, and underneath the arch of your eyebrow. “This diagonal line of light will lift everything up,” adds Patinkin.
Step 4: Lift with Liner
The makeup equivalent of a high ponytail, well-placed liner will draw everything up and make your eyes (and face) look fresher and more rested. “Setting a contrast between a dark liner and the whites of your eyes adds immediate brightness,” says Patinkin. Simply trace along your lashline, giving an ever-so-subtle flick at the outer edge of your eye. A liquid format like the NakedPoppy Clean Liquid Eyeliner makes application more effortless and long-lasting — and the effect more polished.
Step 5: Press, Wiggle, and Fluff
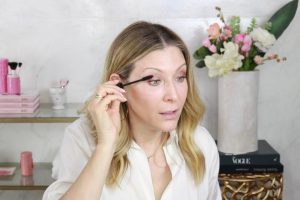
Once your liner is set, it’s time to focus on your lashes — starting with a lash curler. (We love the Ere Perez Spectacular Eyelash Curler.) “A straight lash is like a canopy that creates a shade over your eyes. When you curl your lashes, you lift that canopy up and light can get to your whole eye,” says Patinkin.
For mascara, try the press, wiggle, and fluff technique, a signature of Patinkin: “Press the mascara wand right into the base of your lashes, wiggle back and forth, and then fluff out towards the tips of your lashes,” she says. “This way, you get most of the product at the base of your lashes and avoid getting a spidery look at your tips.” A curl-enhancing formula, like Lily Lolo Natural Vegan Mascara, will give you the most wide-awake finish.
Step 6: Boost Your Brows
Simply brushing your brow hairs with a spoolie brush will go a long way toward looking more alert, but the way you apply a brow pencil will make a difference. “Start at the outer third of your brow by the arch,” advises Patinkin. The reason? “The first place you put that pencil down is where most of the pigment gets deposited.”
If you start at the inner part of your brow, you risk making that area most prominent, which will weigh everything down. Just make sure you stick with a creamy formula, like the Alima Pure Natural Definition Brow Pencil, which will blend into your hairs more easily for a more natural and put-together finish.
Get “shockingly accurate” clean beauty picks. Take your beauty assessment.
Shop the story:
- Odacité Baobab Sarsaparilla Eye Serum Concentrate 👁
- Jenny Patinkin Rose on Rose Face Roller 🌹
- Au Naturale Color Theory Creme Corrector – Peach 🍑
- Kosas Revealer Super Creamy + Brightening Concealer and Daytime Eye Cream ☀️
- Jenny Patinkin Luxury Vegan Conceal / Buff Brush 💖
- Ere Perez Chamomile Eye Palette – Gorgeous 💁♀️
- NakedPoppy Clean Liquid Eyeliner 👀
- Ere Perez Spectacular Eyelash Curler 🎊
- Lily Lolo Natural Vegan Mascara 🐰
- Alima Pure Natural Definition Brow Pencil ✏️

Welcome to the NakedPoppy Blog
We make it easy to find clean makeup, tailored to you.


Comments