How to Use Color Corrector Strategically
Ever heard the advice to work smarter, not harder? That’s the thinking of color correctors, which take a strategic approach to various forms of discoloration on the skin. “The idea is that you can address undesired hues on your skin — caused by hyperpigmentation and hypopigmentation, blemishes, or scars — by using complementary colors to neutralize the area,” says makeup artist Misty Spinney.
The beauty of color correctors is that they allow you to use less concealer and foundation to even out skin tone and blur any concerns, allowing you to wear less complexion makeup overall — whether or not you’re going for a no-makeup makeup look. That allows skin to continue to look like, well, skin, all the while concealing whatever you want concealed. If that’s not empowering, we’re not sure what is.
With that in mind, here’s exactly how a color corrector works — and how to use it to address whatever kind or type of pigmentation you’re trying to cover.
What color corrector does
Most complexion products use opacity to literally cover up discoloration. “Foundations and concealers, meanwhile, can provide coverage for and may even disguise certain skin discolorations, but they can only go so far,” says Spinney. Not only that, but you may need a ton of it to conceal deep tones, such as dark spots.
That’s where the idea of color theory comes in. Think back to art class — remember the color wheel? It posits that colors opposite one another on the color wheel, such as yellow and purple, red and green, and blue and orange, neutralize one another to effectively make them disappear.
That’s the primary inspiration behind color correctors, though it’s important to note that color correctors don’t hew to the classic color wheel — which is more of an art concept. After all, canvases don’t come with a skin tone.
How to choose a color corrector
To pick the right color corrector, first take a good look at the pigmentation you’re trying to cover. “For an accurate concealment, use a color complementary to the underlying area you wish to blend,” Spinney says. (Heads up: She also notes that you still have to apply a light layer of concealer or foundation, or both, over your color corrector to help it blend in.)
Then, factor in your skin tone, which can also play a role in choosing the right corrector shade. Use both to determine the color you choose (and don’t forget, the 3-min NakedPoppy assessment will do all of that work for you).
- For dark under-eye circles in fair to medium skin tones: Try a peachy-pink color, which will neutralize the blue tone of dark circles.
- For dark under-eye circles and hyperpigmentation in medium to dark skin tones: Try an orange shade, which helps counteract the purple tone of both hyperpigmentation and dark circles.
- For redness and blemishes in fair to medium skin tones: Try a green shade, which cancels out the red hues.
As for the texture, Spinney prefers color-correcting creams, which can come in a range of coverage. “Lighter ones are more of a primer, and then the thicker, heavier-duty creams can be layered thick or worked into a subtle coverage,” she explains. “[Either way,] I find that creams apply more easily, are easier to blend, and last longer.”
For beginners, she recommends the Fitglow Beauty Correct+, as it’s a “softer, lighter formula that is user-friendly.” It comes in peach for dark circles among fair- to medium-toned people, green for redness and blemishes, and deep peach to tackle those purple-toned dark circles in those with darker skin. (Pro tip: A little will go a long way!)
Again, if you’re not sure exactly what shade you need for your concerns, no sweat — just take the easy, 3-minute NakedPoppy assessment to find what will work best.
How to use color corrector in your makeup routine
Once you know how to incorporate color correctors, it’ll become second nature; in fact, it shouldn’t take more than a few seconds to layer it between your foundation or concealer. Here’s how to apply it like a pro.
- Step 1: Prep your skin with your skincare routine (here’s how!) and let your products absorb.
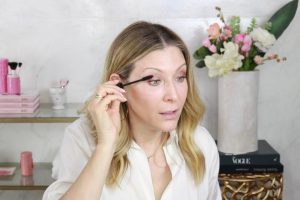
- Step 2: Then, use a brush to tap your color corrector onto the area you’re trying to color. Pro tip: Less is more; it’s easier to add more than to take off extra.
- Step 3: Let it set for a moment before applying the layer of concealer, foundation, or tinted moisturizer, blending well.
- Step 4 (optional!): Dust a light layer of setting powder to fix it in place, gently tapping it on. (Try to avoid swiping it, as it can become cake-y.).
After that, you can proceed with your bronzer, blush, and highlighter, or, of course, call it a day.
And remember: With the power of complementary color, a small amount of color corrector can give you results that would otherwise require layers of foundation and concealer. So, not only will it lend a naturally smooth, even-toned look that lasts all day, but it ultimately means you have to apply less makeup overall — making it a win-win addition to your makeup bag.
Get “shockingly accurate” clean beauty picks. Take your beauty assessment.
Shop the Story:

Welcome to the NakedPoppy Blog
We make it easy to find clean makeup, tailored to you.


Comments